Sync ServiceNow CIs with SevOne
Overview
In this lab we will review how we can make sure that all the CIs with the monitor flag on in ServiceNow are monitored in SevOne.
The flow of this lab is the following:
We get the list of current CIs in a list of CI tables in ServiceNow that have the monitor field enabled
For each of these CIs, we will get the name and try to find if there a device with the same name in SevOne
If the device already exists in SevOne, no further actions will be taken
If the device is not found in SevOne a new device will be added in SevOne with the name and ipaddress fromr ServiceNow
Prerequirements
In order to complete this lab, it is required to have access to a ServiceNow instance. If you don't have one already, please create one using following the steps defined on this link.
It's important to change your role to admin to be able to use the instance properly (see link here )
Prepare the System
On the Developer Instances in ServiceNow, all CIs come with the monitor flag off and without IP address. Therefore we will manually configure a couple of CIs with an IP address and enable the monitor flag before we create this workflow, otherwise there wouldn't be any CI to integrate in SevOne.
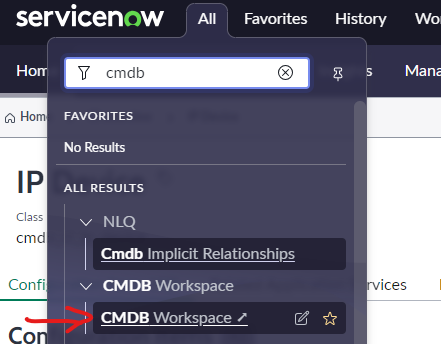
Go to your ServiceNow instance
i. Click on All
ii. Search for CMDB
iii. Click on CMDB workspace (inside the CMDB workspace group)
- Scroll down where CI overview is, and click on the 'Servers' column
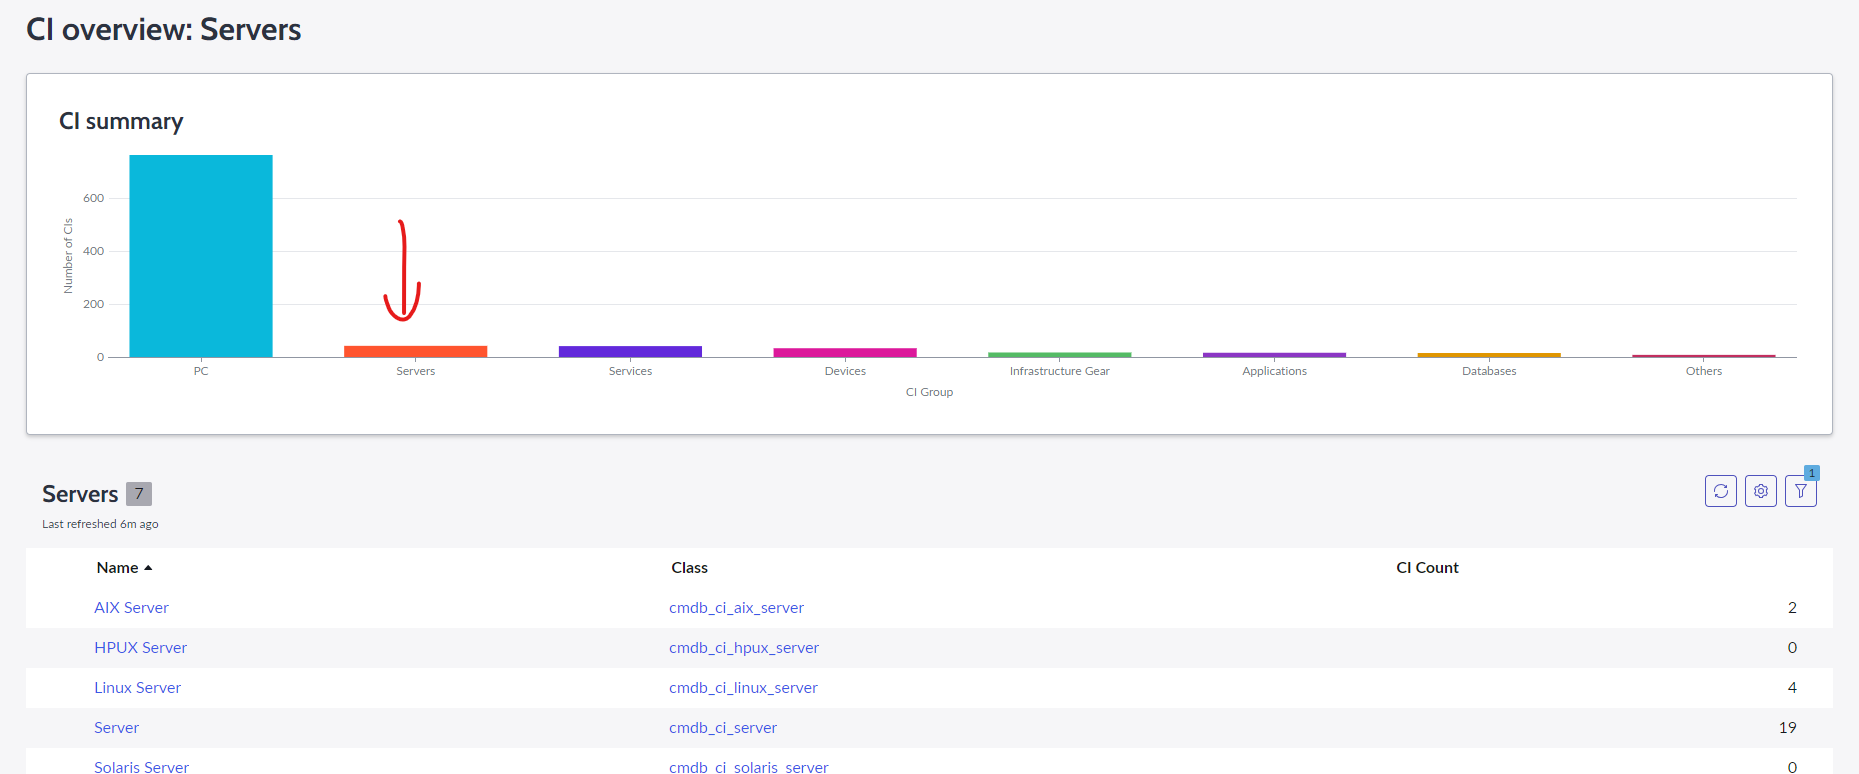
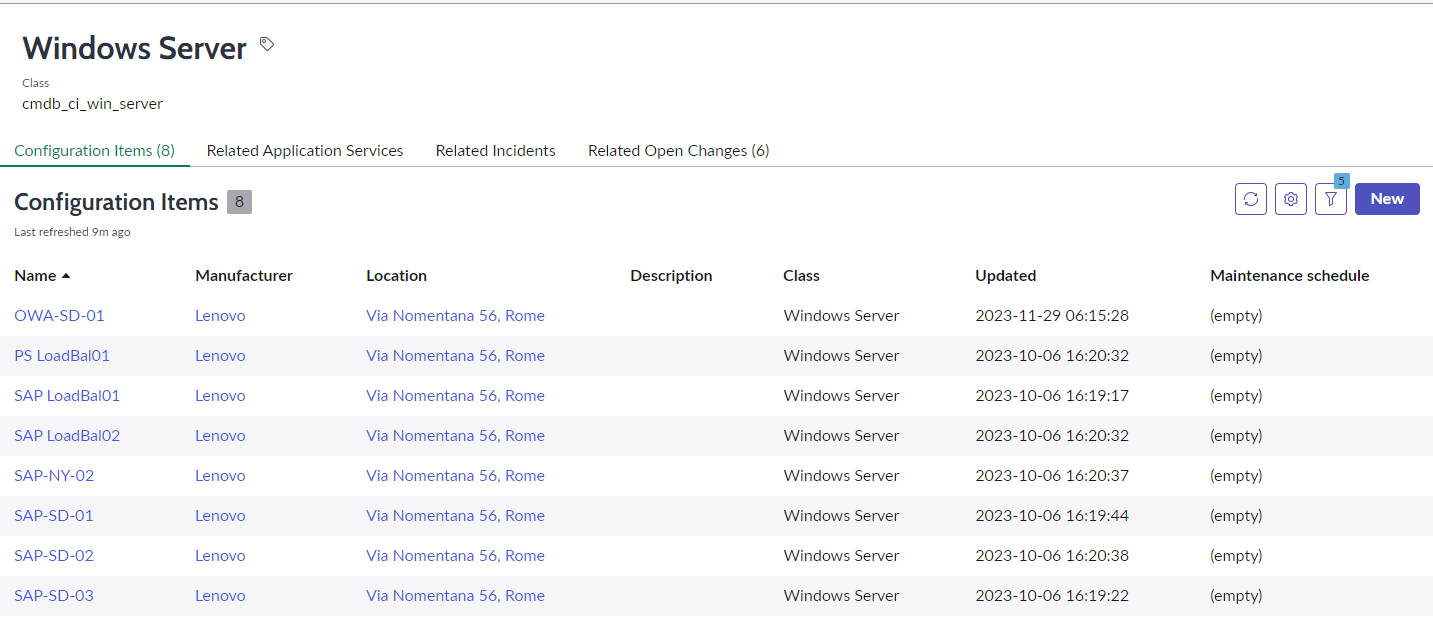
Click on Windows Servers
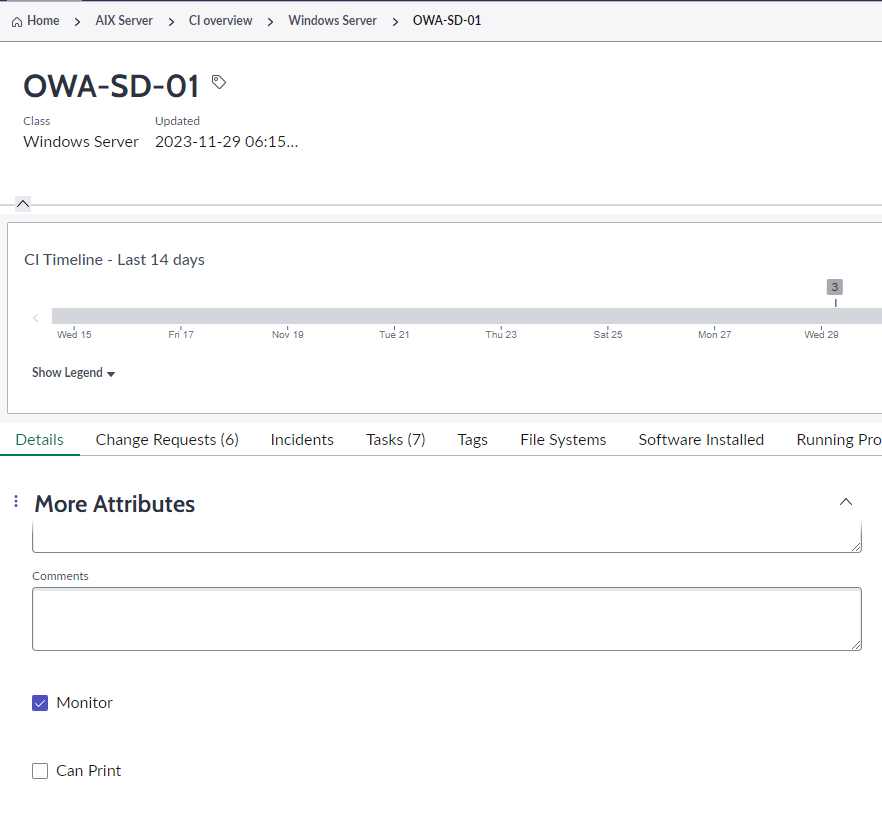
i. Click on one of the servers, for example on OWA-SD-01
ii. Scroll down until you find the IP Address section, and add an IP address, for example 10.10.10.1

iii. Keep scrolling down and enable the Monitor field
- Do the same for another server, for example PS LoadBal01, with a different IP address, for example 10.10.10.2 (and remember to enable the monitor flag)
ServiceNow - SevOne CI sync
If SevOne authentication has already been created, please skip this block of actions and continue to step 8.
Log into SANO automation platform
Go to Authentications
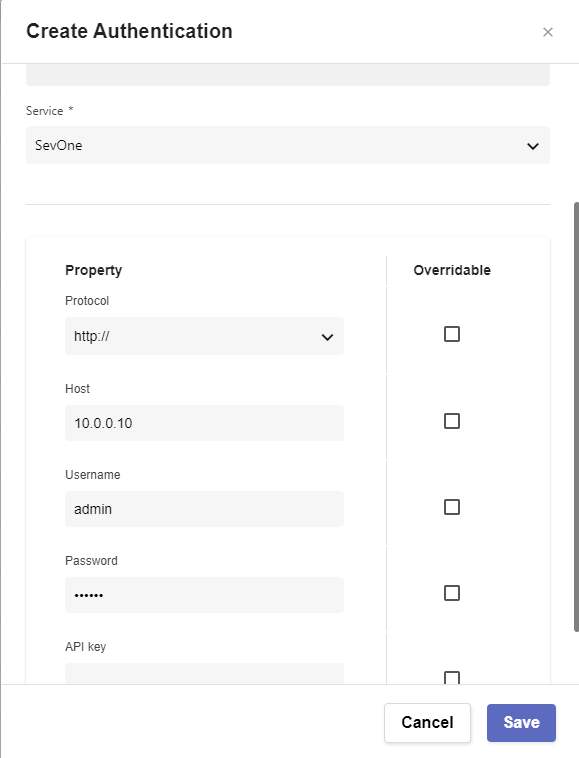
Click Create Authentication
a. Name: SevOne
b. Service: SevOne
c. Protocol: http:// (<-- important)
d. Host: 10.0.0.10
e. Username: admin
f. Password: SevOne
If ServiceNow authentication has already been created, please skip this block of actions and continue to step 9.
Click Create Authentication
a. Name: ServiceNow
b. Service: ServiceNow
c. Protocol: https://
d. Host: (Your SNOW instance URL, example: dev109667.service-now.com)
e. Username: (Your SNOW instance username, example: admin)
f. Password: (Your SNOW instance password)
Go to Workflows
Click Create Workflow
a. Name: Sync ServiceNOW CIs with SevOne
b. Layout type: Sequence
Add variables to Start
a. NMSCredentials
i. Name: NMSCredentials

ii. Type: Authentication -> SevOne

iii. Default Value: "admin/SevOne"

iv. In

v. Required
b. ServiceNowCredentials
i. Name: ServiceNowCredentials

ii. Type: Authentication -> ServiceNow

iii. Default Value: "admin/ServiceNow"

iv. In

v. Required
c. tables
i. Name: tables

ii. Type: array

iii. Default Value: ['cmdb_ci_server','cmdb_ci_ip_device']

iv. In

v. Required

Change to Flow View
On the left hand side panel, Click on Common
Select "ForEach" and drop it after the building block START
a. Change name to ForEach_Table
b. Click on the building block to open the right side panel and complete the following fields
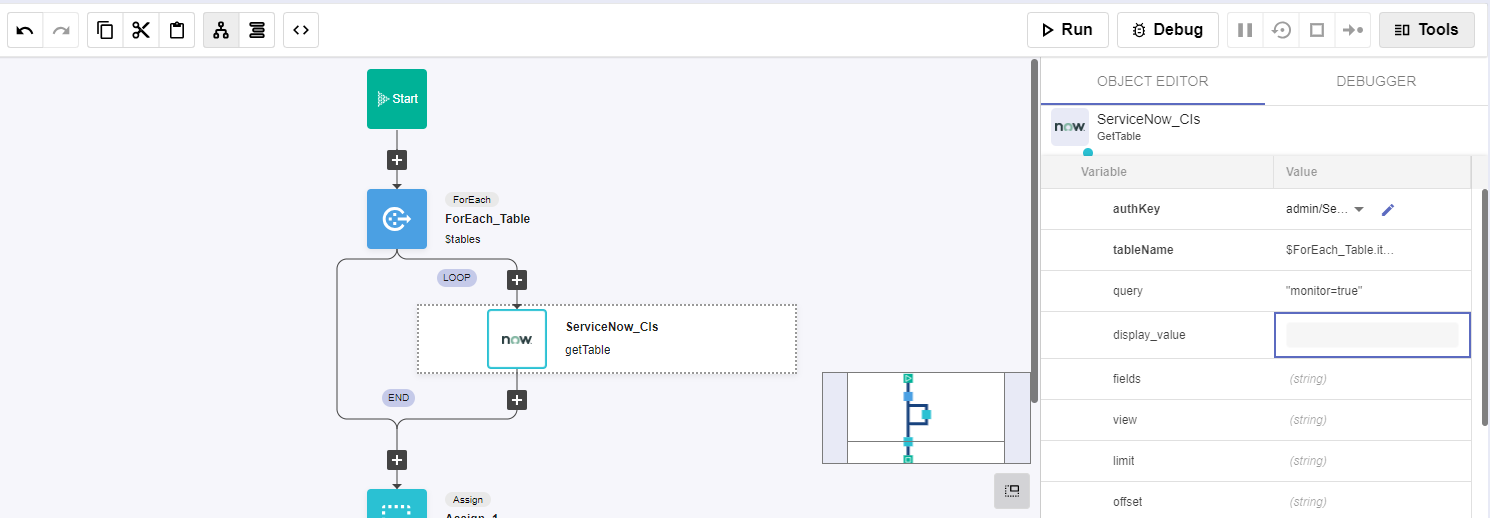
i. list: $tablesInside the LOOP, add a new building block, ServiceNow -> getTable
a. Change name to ServiceNow_CIs
b. Click on the building block to open the right side panel and complete the following fields
i. authKey: $ServiceNowCredentials

ii. tableName: $ForEach_Table.item

iii. query: "monitor=true"
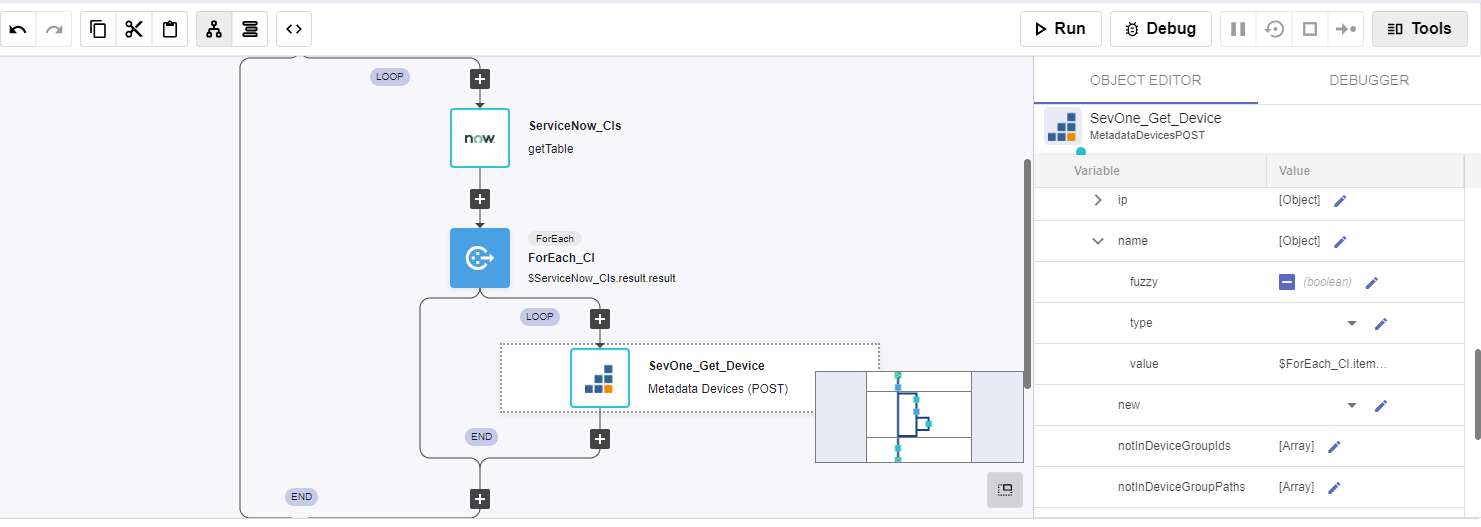
Add a new building block, Common -> ForEach
a. Change name to ForEach_CI
b. Click on the building block to open the right side panel and complete the following fields
i. list: $ServiceNow_CIs.result.resultInside the LOOP, add a new building block, SevOne-> REST v3 -> Metadata
a. Change name to SevOne_Get_Device
b. Click on the building block to open the right side panel and complete the following fields
i. authKey: $NMSCredentials

ii. body -> name -> value : $ForEach_CI.item.name
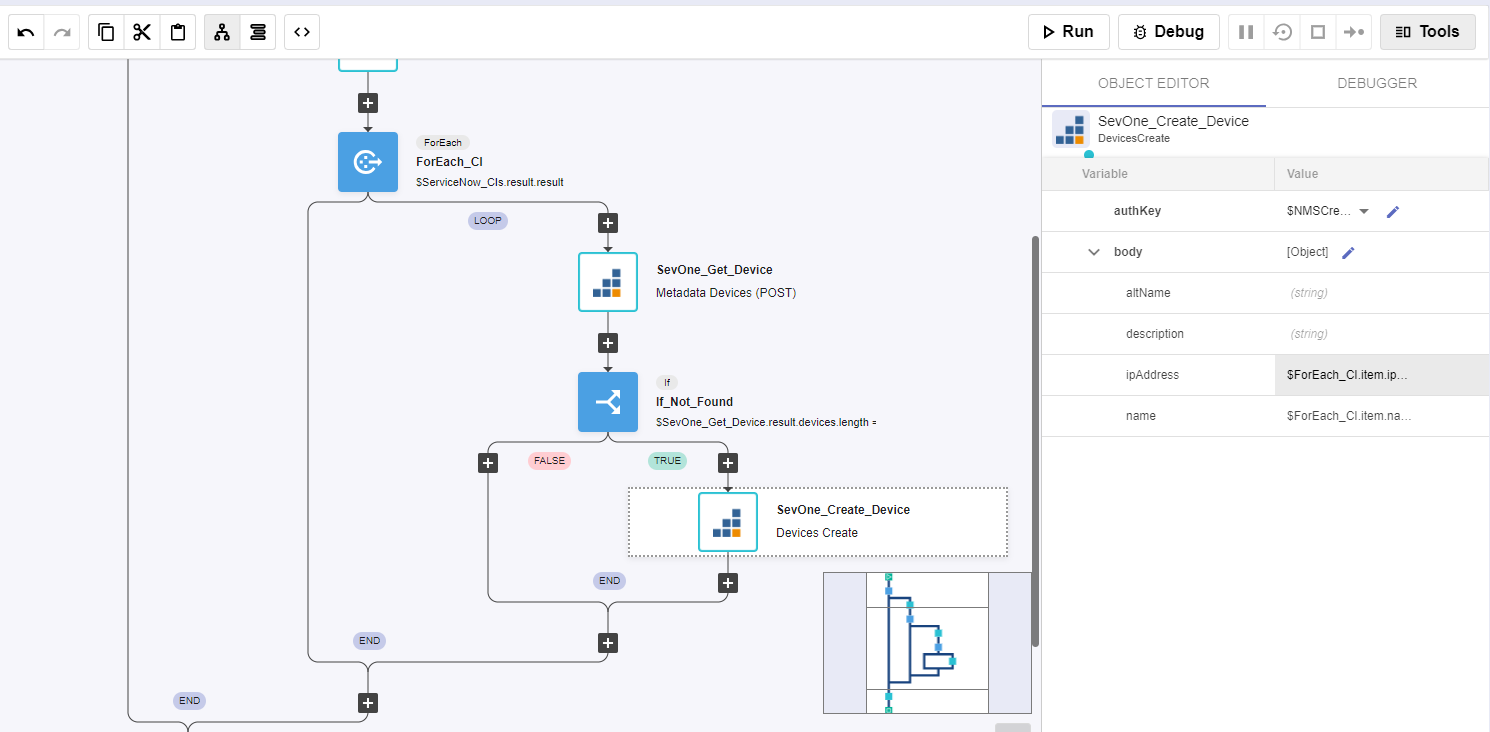
Add a new building block, Common -> If
a. Change name to If_Not_Found
b. Click on the building block to open the right side panel and complete the following fields
i. condition: $SevOne_Get_Device.result.devices.length == 0In the 'TRUE' branch of the IF, add a new building block, SevOne -> REST v2 -> Devices -> Create Device
a. Change name to SevOne_Create_Device
b. Click on the building block to open the right side panel and complete the following fields
i. authKey: $NMSCredentials

ii. device:

    1. name: $ForEach_CI.item.name

    2. ipAddress: $ForEach_CI.item.ip_address

    3. pollFrequency: 60

    4. pluginInfo: {"2": {"extendedInfo": {"packetInterval":"0","packetNumber":"5","packetSize":"64"}}}
Review
To test the workflow, click on Run
Go to SevOne (vPAS)
Click on Devices -> Device Manager
There should be two new devices
